
Zones: delivery areas on the map
Draw delivery areas as polygons, use them to keep drivers in (or out of) specific neighborhoods, and watch the coverage warnings that catch gaps.
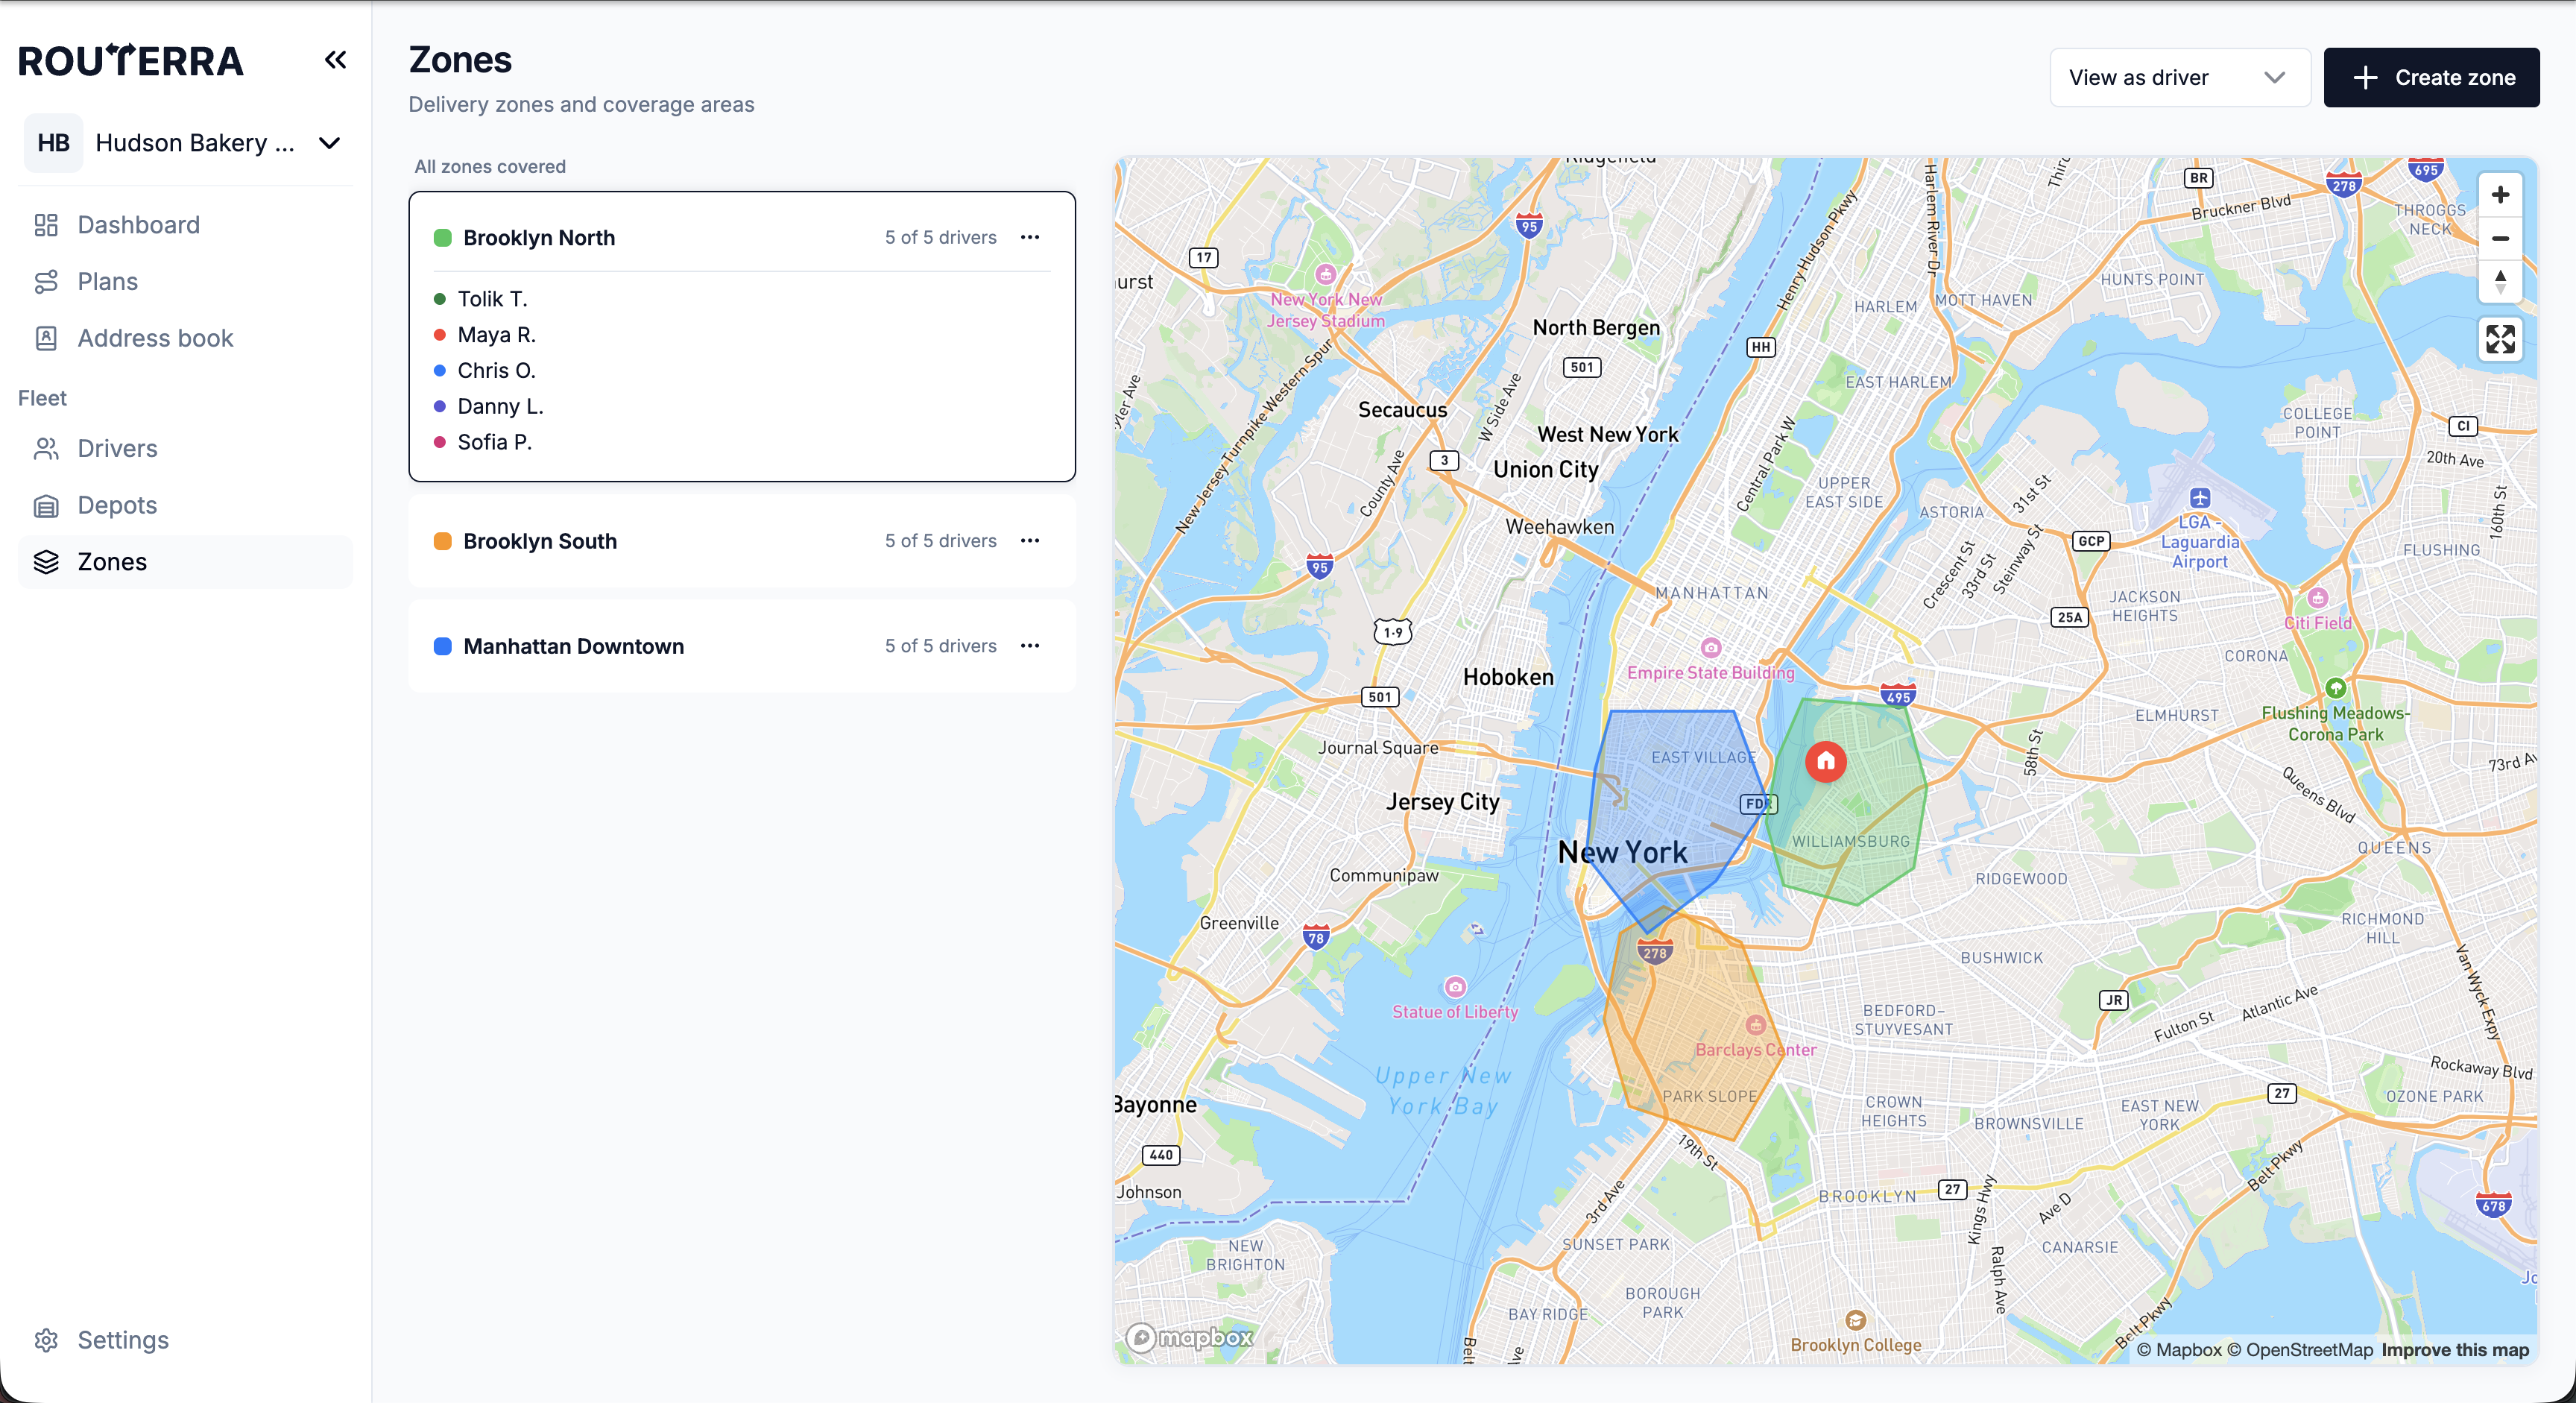
A zone is a delivery area you draw on the map. Zones let you keep drivers where they belong — the downtown driver downtown, the van out of the pedestrian district — and they give the optimizer a map of who's allowed where. Zones live under Fleet → Zones.
Drawing a zone
Open Fleet → Zones
You'll see a map with any existing zones.
Draw the polygon
Trace the area on the map — click to place corners and close the shape. ("Draw your first zone on the map above.")
Name and color it
Give it a Zone Name (e.g. "Downtown Area"), pick a Zone Color, and set the Fill Opacity so overlapping zones stay readable.
Add Zone
Save it. You can edit the shape later — the map has an editing mode for reshaping an existing zone.
Restricting drivers to zones
Zones do their real work through driver zone restrictions (driver settings). For each driver:
- Default — services every zone (unless the driver has Allowed zones, then only those).
- Allowed — restrict the driver to specific zones.
- Excluded — prevent the driver from servicing certain areas.
The optimizer honors these when it builds routes: a stop inside an Excluded zone won't be given to that driver, and a driver with Allowed zones only gets stops inside them. As the app puts it: "Drivers with no zone assignments can service all areas. Use ALLOWED to restrict drivers to specific zones, or EXCLUDED to prevent them from servicing certain areas."
Coverage warnings
Restrictions can accidentally leave an area with nobody to serve it. Routerra watches for this and warns you: when every zone has an eligible driver you'll see All zones covered; when one doesn't, it flags the count of zones that have no eligible drivers, each marked No eligible drivers.
What's next
- Drivers: profiles, shifts, and vehicles — applying zone restrictions per driver
- Assign drivers and optimize — how zones shape the result