
Import stops: paste, file, photo, and more
Every way to get your delivery stops into a plan — from pasting a list of addresses to pulling orders straight from your own system.
Every route starts with a plan full of stops. Open a plan and press Import Stops — a menu offers four ways in (and a fifth, Pull from data source, appears once you've connected one). Use whichever matches where your orders live today; you can mix methods freely in the same plan.
| Method | Best when |
|---|---|
| Paste List | Your stops are in a message, note, or email |
| Upload File | You have a spreadsheet — CSV, XLS, or XLSX |
| Upload Image | Your manifest is on paper or in a photo |
| Team Address Book | You deliver to the same places regularly |
| Pull from data source | Your orders live in your own dispatch system (shows once connected) |
Paste a list of addresses
The fastest way to get going.
Open your plan and press Import Stops
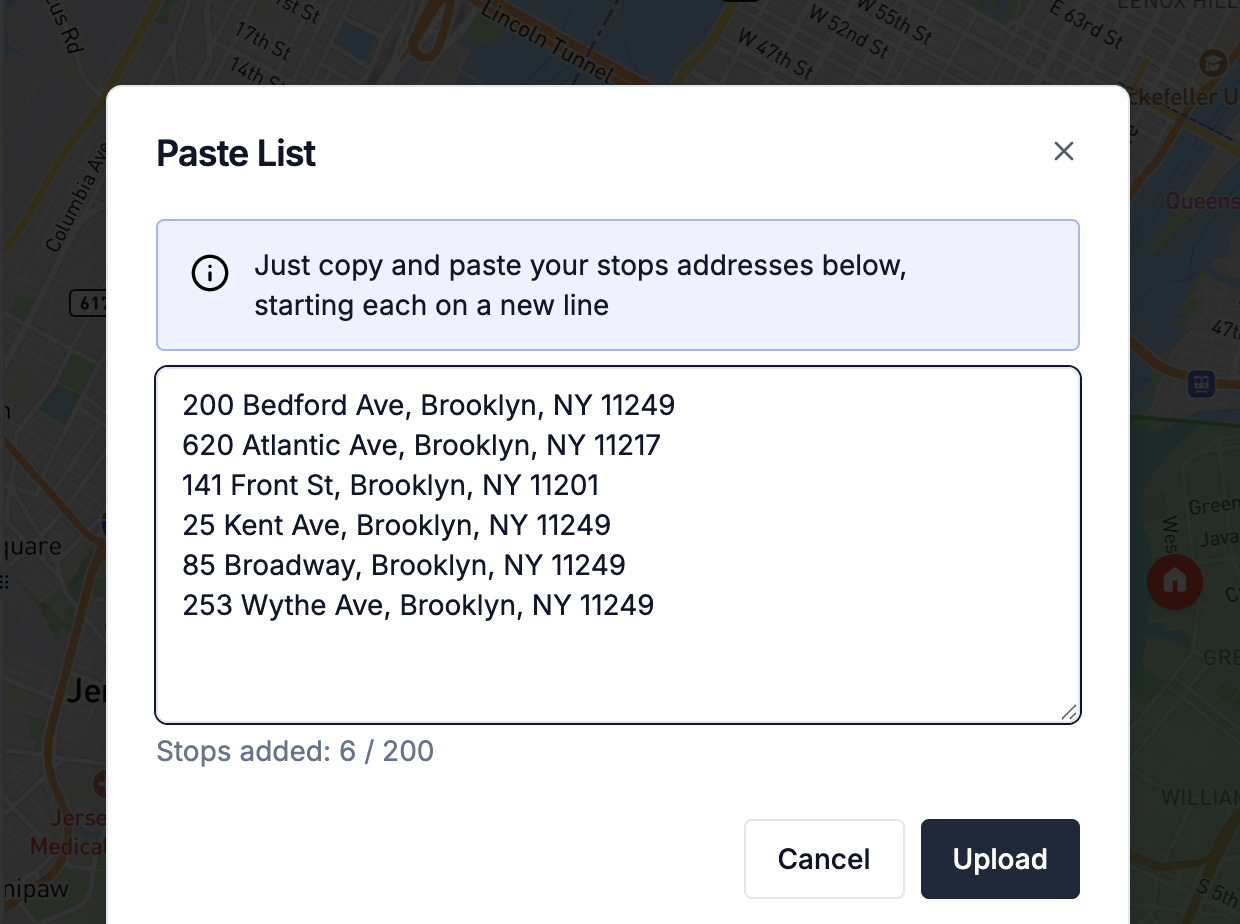
On the plan page, choose Paste List from the import menu.
Paste your addresses — one per line
Each line becomes one stop. A line can be just an address, or an address with a name in front of it. The counter under the box shows how many stops you can still add to this plan.
Press Upload
Routerra finds each address on the map (geocoding). Stops appear in the plan as they're matched.
Scan the pins
Give the map a quick look — if a pin landed somewhere odd, open the stop and fix the address or coordinates before you optimize.
Upload a spreadsheet
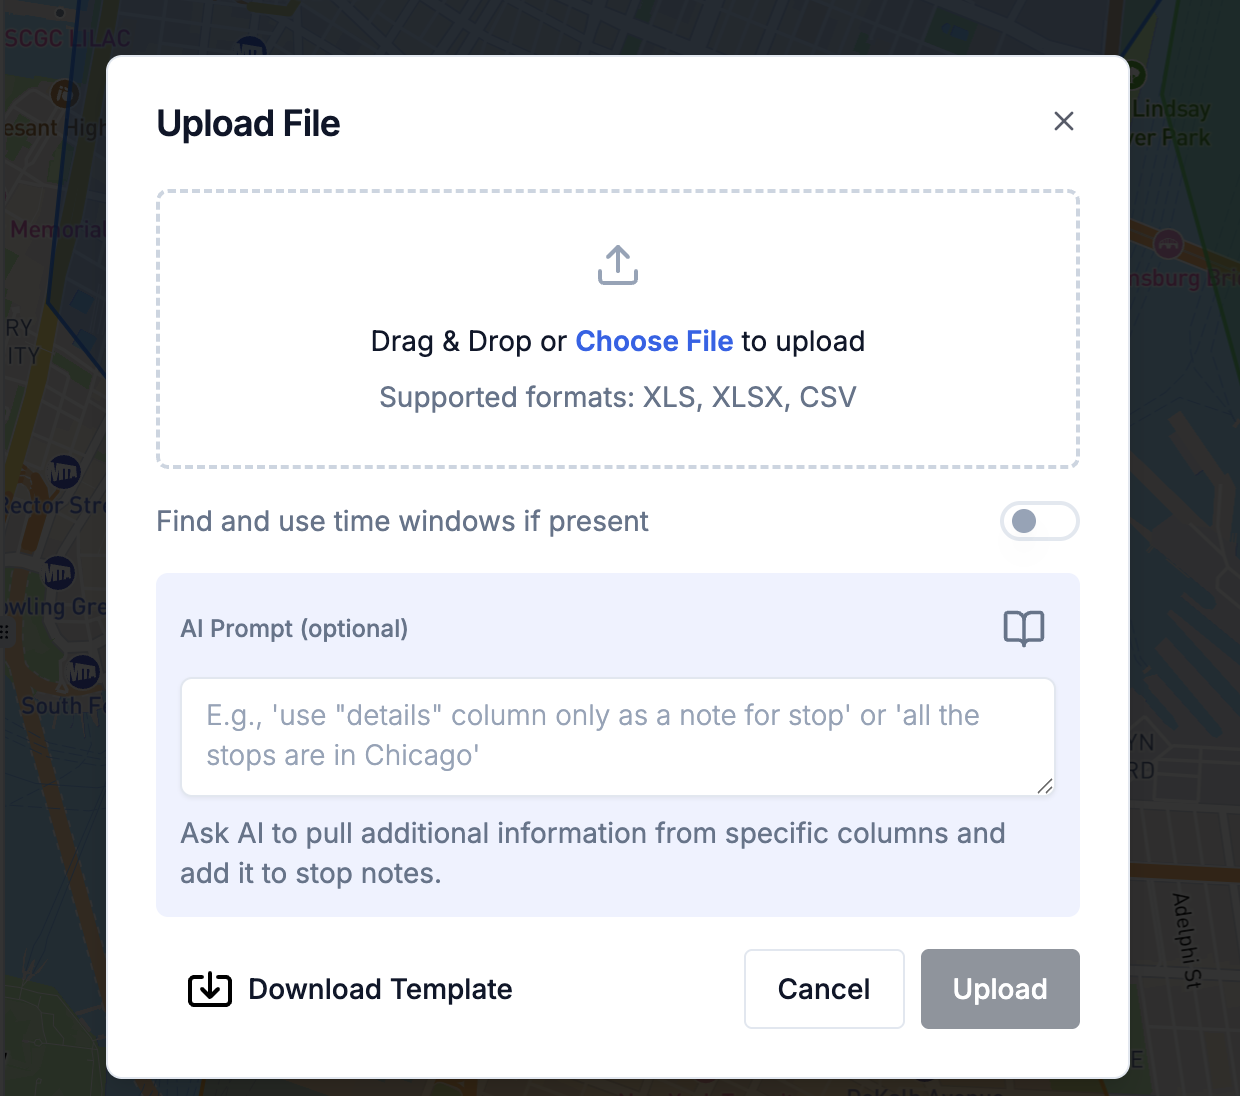
Pick Upload File and drop in a CSV, XLS, or XLSX file. If you're not sure how to shape the columns, press Download Template in the dialog — but Routerra also handles most real-world spreadsheets as they are.
Two options are worth knowing:
- Find and use time windows if present — if your file has columns like "deliver between 9 and 12", they become arrival windows on the stops.
- AI Prompt (optional) — a plain-language hint for pulling extra columns into stop notes. For example: "Phone numbers are in column F, apartment numbers are in the comments column." You can save prompts you use often and reuse them from the list.
Snap a photo of your manifest
Pick Upload Image and upload a photo — or use Take Photo from a phone. Routerra reads the image and extracts the stops it finds. It works on printed manifests, handwritten lists, and screenshots.
The same AI prompt hint is available here: tell it what to look for, and check the extracted list before importing.
Add saved addresses from the Team Address Book
Pick Team Address Book to add stops you've delivered to before — with their saved service times, arrival windows, notes, and attachments already applied. A dedicated Team Address Book guide is coming soon.
Pull from your own system
If your orders live in your own dispatcher or back office, connect a data source once (Settings → Data sources) and a Pull from data source option appears in the import sheet. Routerra asks your endpoint for stops and imports whatever it returns.
There's also a full developer path — the Optimize API and signed webhooks — covered in the Developer Platform guides (coming soon).
Limits
| Limit | Value |
|---|---|
| Stops per plan | Depends on your team's plan — the paste dialog shows how many you can still add |
| File size | 10 MB per file, 25 MB total |
| Characters per address line | 255 |
Bigger operation? Split the day into multiple plans, or contact us at [email protected] — the self-serve limits aren't the ceiling.
What happens after import
Imported stops land in the plan's Stops tab, geocoded and pinned on the map. From here you'll typically:
- Fix anything that geocoded oddly (open the stop, adjust address or coordinates).
- Set per-stop details that matter today — arrival windows, service time, load.
- Press Assign drivers & optimize — covered in Assign drivers and optimize.